NVIDIA Brev Deployment — Isaac Sim Documentation
Title: NVIDIA Brev Deployment — Isaac Sim Documentation
URL Source: https://docs.isaacsim.omniverse.nvidia.com/latest/installation/install_advanced_cloud_setup_brev.html
Published Time: Tue, 21 Oct 2025 19:24:38 GMT
Markdown Content: NVIDIA Brev Deployment#
Requirements#
The requirements for running NVIDIA Isaac Sim on NVIDIA Brev are:
-
An NVIDIA Brev account.
-
The Isaac Sim WebRTC Streaming Client app.
Setup#
Follow these steps to launch a GPU instance in VM Mode on NVIDIA Brev:
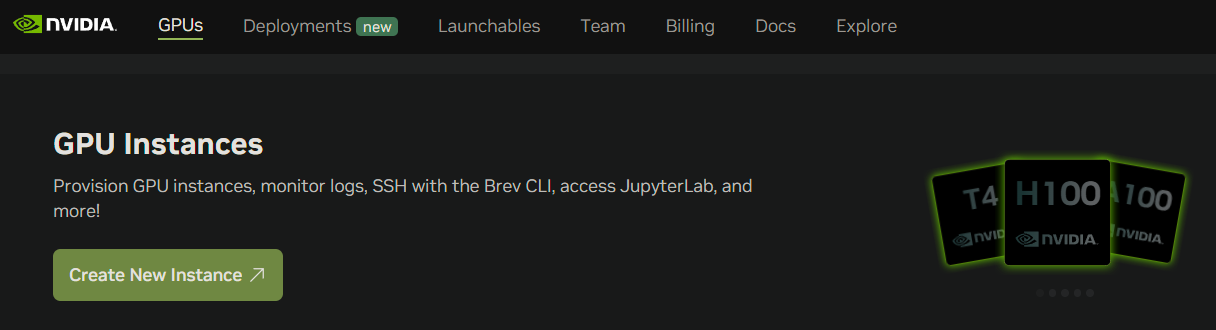
-
Navigate to NVIDIA Brev.
-
Click Get Started to sign in or create and account.
-
Click Create New Instance
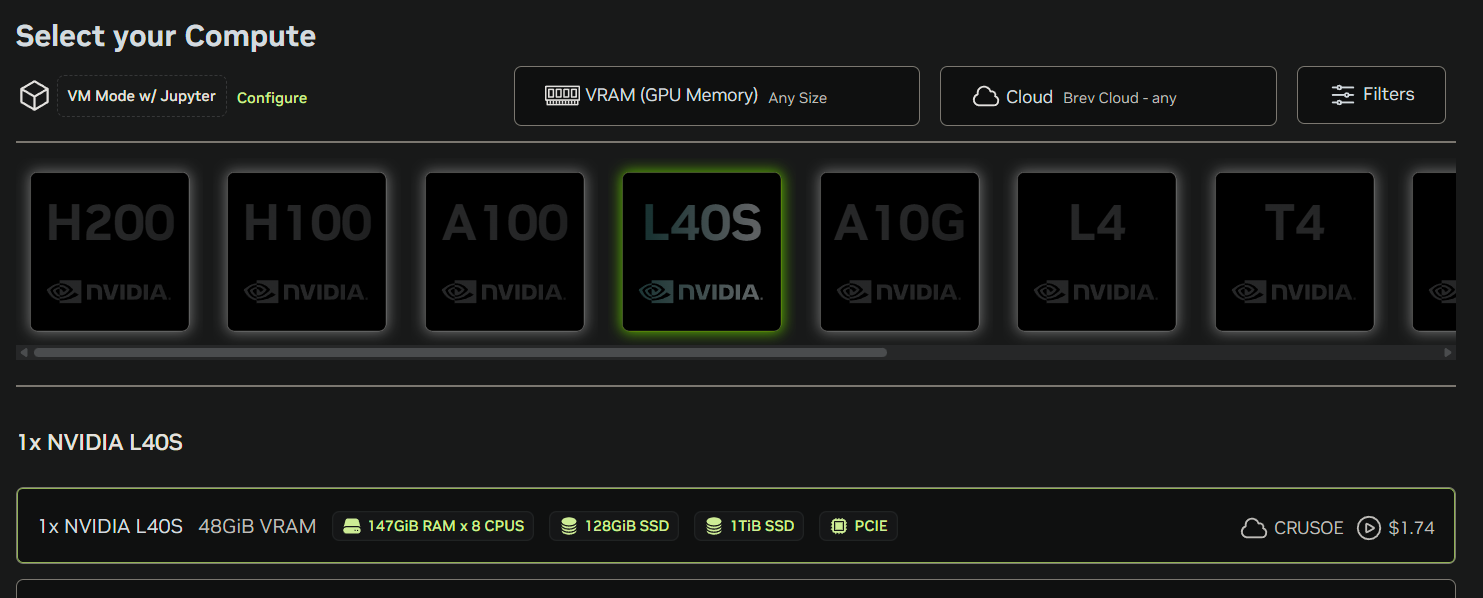
- Select 1x NVIDIA L40S GPU.
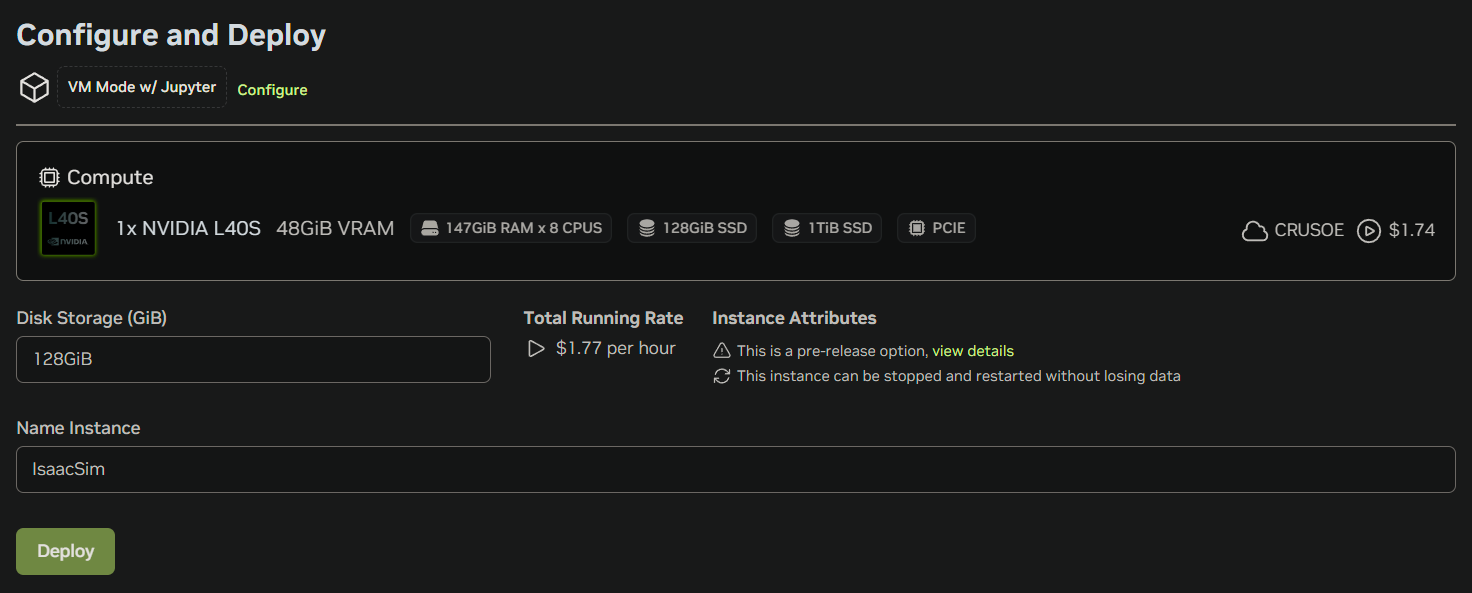
- Name the instance and click Deploy.
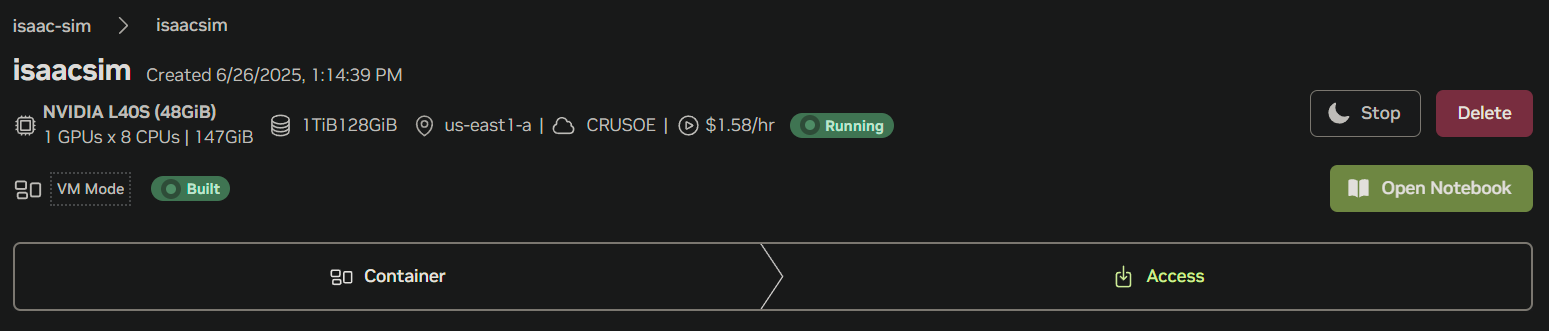
- Wait for the VM to be ready.
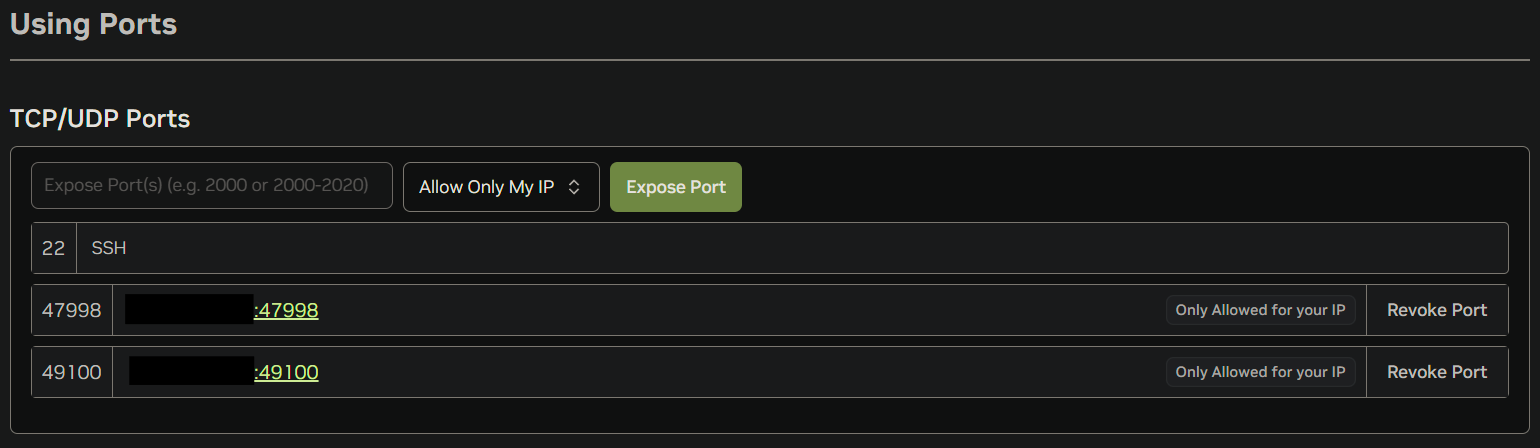
- Expose ports 49100 and 47998 only to your IP for security and access to WebRTC live streaming.
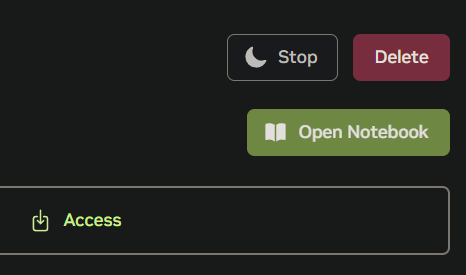
- Click Open Notebook at the top of the page.
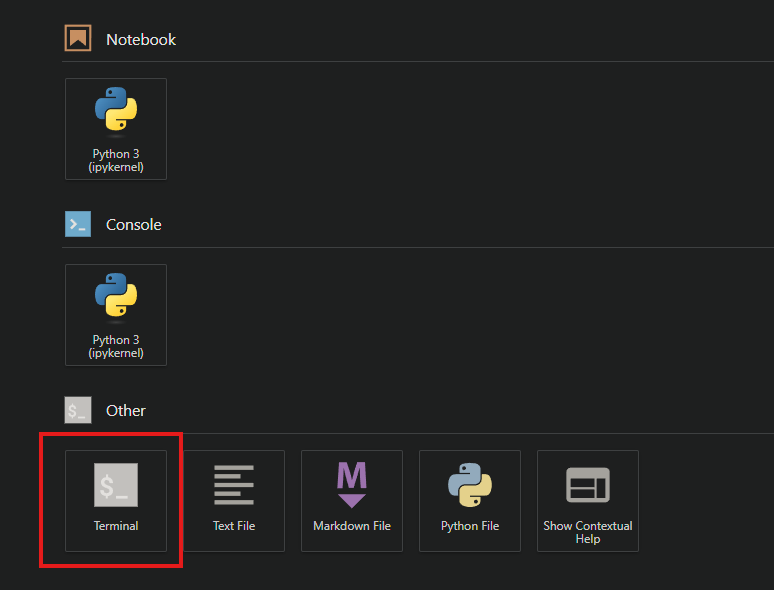
- Open the Terminal in the Jupyter Notebook page.
 Running Isaac Sim Container#
Follow the instructions below on a terminal:
- Get the public IP address of the instance:
$ curl -s ifconfig.me
- Pull the Isaac Sim Container:
$ docker pull nvcr.io/nvidia/isaac-sim:5.1.0
- Create the cached volume mounts on host:
$ mkdir -p ~/docker/isaac-sim/cache/main/ov $ mkdir -p ~/docker/isaac-sim/cache/main/warp $ mkdir -p ~/docker/isaac-sim/cache/computecache $ mkdir -p ~/docker/isaac-sim/config $ mkdir -p ~/docker/isaac-sim/data/documents $ mkdir -p ~/docker/isaac-sim/data/Kit $ mkdir -p ~/docker/isaac-sim/logs $ mkdir -p ~/docker/isaac-sim/pkg $ sudo chown -R 1234:1234 ~/docker/isaac-sim
- Run the Isaac Sim container with an interactive Bash session:
$ docker run --name isaac-sim --entrypoint bash -it --gpus all -e "ACCEPT_EULA=Y" --rm --network=host
-e "PRIVACY_CONSENT=Y"
-v ~/docker/isaac-sim/cache/main:/isaac-sim/.cache:rw
-v ~/docker/isaac-sim/cache/computecache:/isaac-sim/.nv/ComputeCache:rw
-v ~/docker/isaac-sim/logs:/isaac-sim/.nvidia-omniverse/logs:rw
-v ~/docker/isaac-sim/config:/isaac-sim/.nvidia-omniverse/config:rw
-v ~/docker/isaac-sim/data:/isaac-sim/.local/share/ov/data:rw
-v ~/docker/isaac-sim/pkg:/isaac-sim/.local/share/ov/pkg:rw
-u 1234:1234
nvcr.io/nvidia/isaac-sim:5.1.0
Note
-
By using the
-e "ACCEPT_EULA=Y"flag, you accept the license agreement of the image found at NVIDIA Omniverse License Agreement. -
By using the
-e "PRIVACY_CONSENT=Y"flag, you opt-in to the data collection agreement found at Data Collection & Usage. You may opt-out by not setting this flag. -
The
-e "PRIVACY_USERID=<email>"flag can optionally be set for tagging the session logs. -
Add the
--runtime=nvidiaflag if there are issues detecting the GPU in the container.
- Start Isaac Sim with native livestream mode:
$ PUBLIC_IP=$(curl -s ifconfig.me) && ./runheadless.sh --/app/livestream/publicEndpointAddress=$PUBLIC_IP --/app/livestream/port=49100
- Connect to the same public IP address of the instance using the Isaac Sim WebRTC Streaming Client app.
Links/Buttons:
- #
- Isaac Sim WebRTC Streaming Client
- NVIDIA Brev
- Isaac Sim Container
- NVIDIA Omniverse License Agreement
- Data Collection & Usage
- Container Deployment
- Livestream Clients